Residential and Commercial Epoxy Services
Revitalize your surroundings with the captivating allure and resilience of our Metallic Epoxy System. Enrich your residential or commercial space in St. Petersburg or Tampa, Florida, with flooring that seamlessly merges sophistication, durability, and endurance. Our epoxy flooring transcends mere functionality, embodying a fusion of elegance and practicality. Discover the myriad advantages that make metallic epoxy flooring the ultimate choice for your upcoming renovation endeavor.
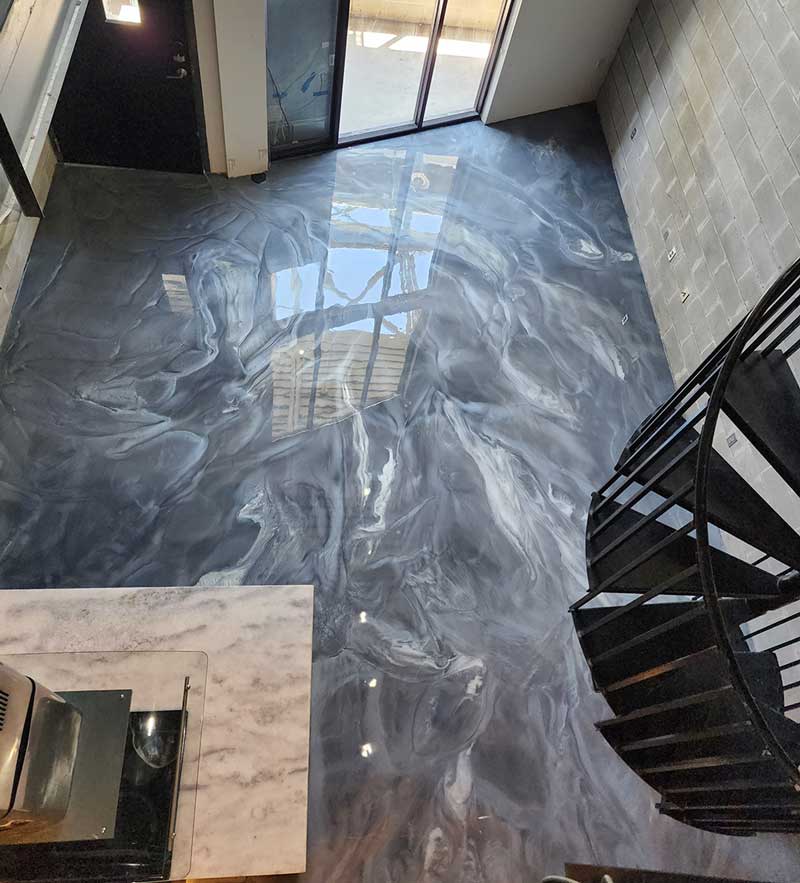
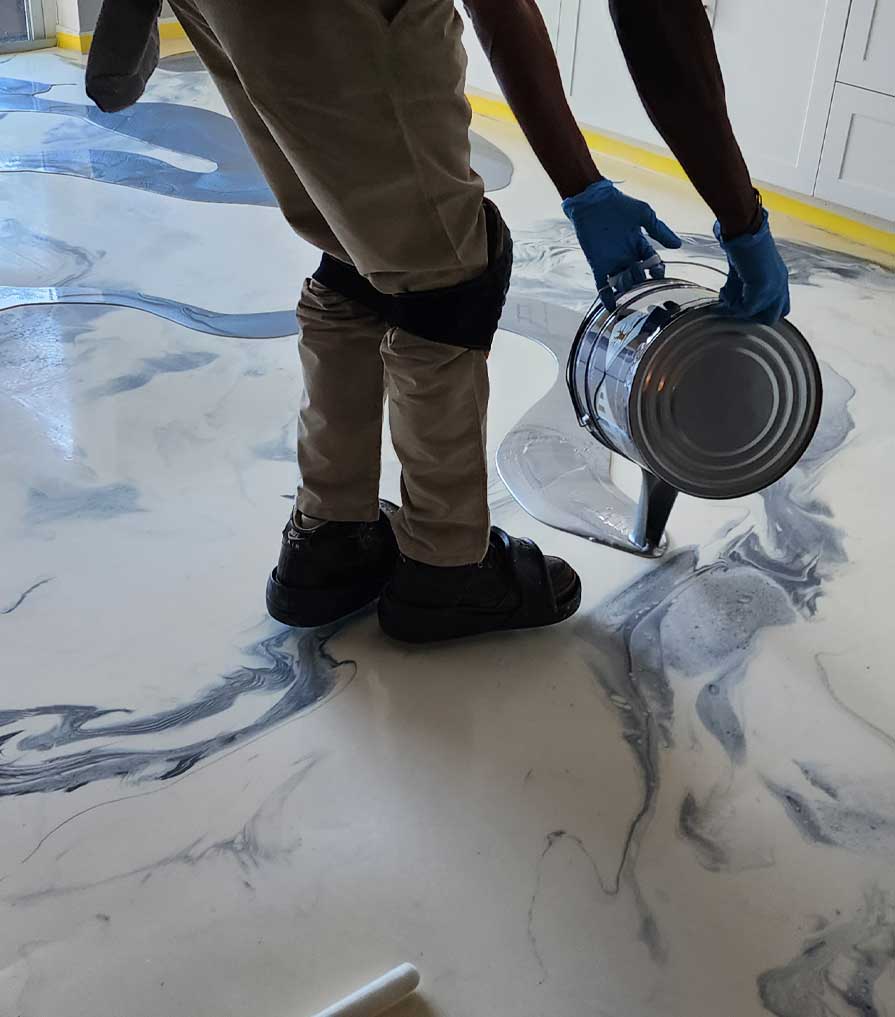
Customized Metallic Epoxy System
Transform your space with the stunning beauty and durability of epoxy metallic flooring. Elevate your home or business in St. Petersburg or Tampa, Florida, with a flooring solution that combines style, strength, and longevity. With its seamless finish and unique metallic designs, epoxy flooring not only enhances the aesthetic appeal of your space but also offers a range of practical benefits. Discover why epoxy metallic flooring is the perfect choice for your next renovation project.
Why choose the metallic epoxy flooring system?
Process Overview
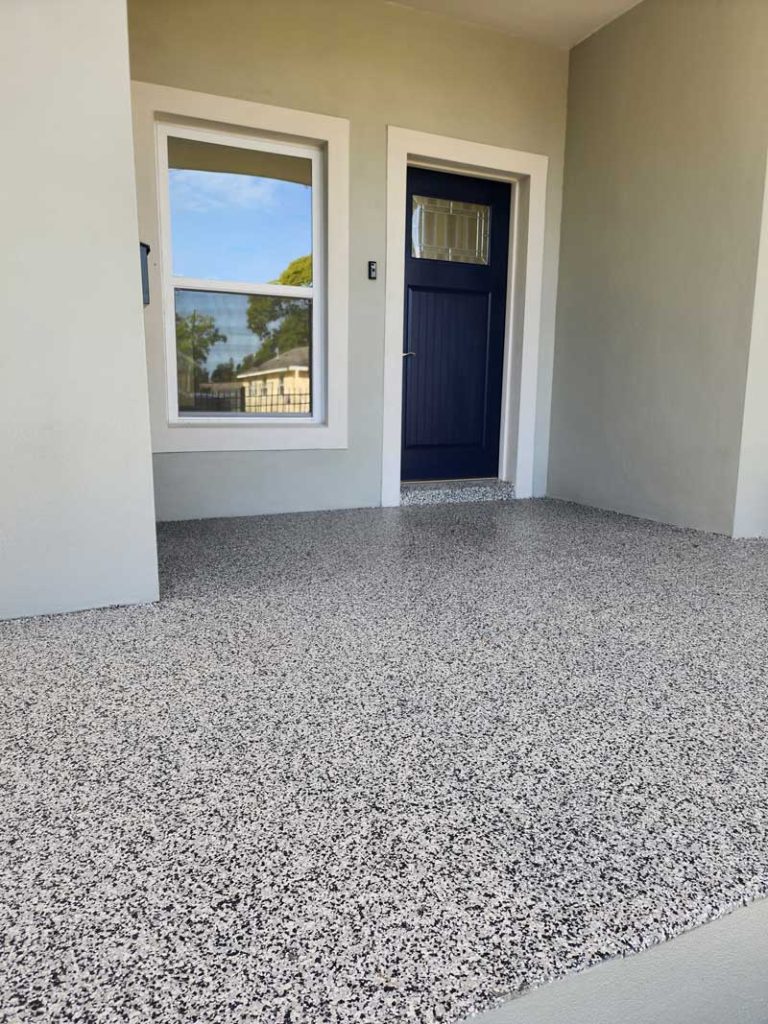
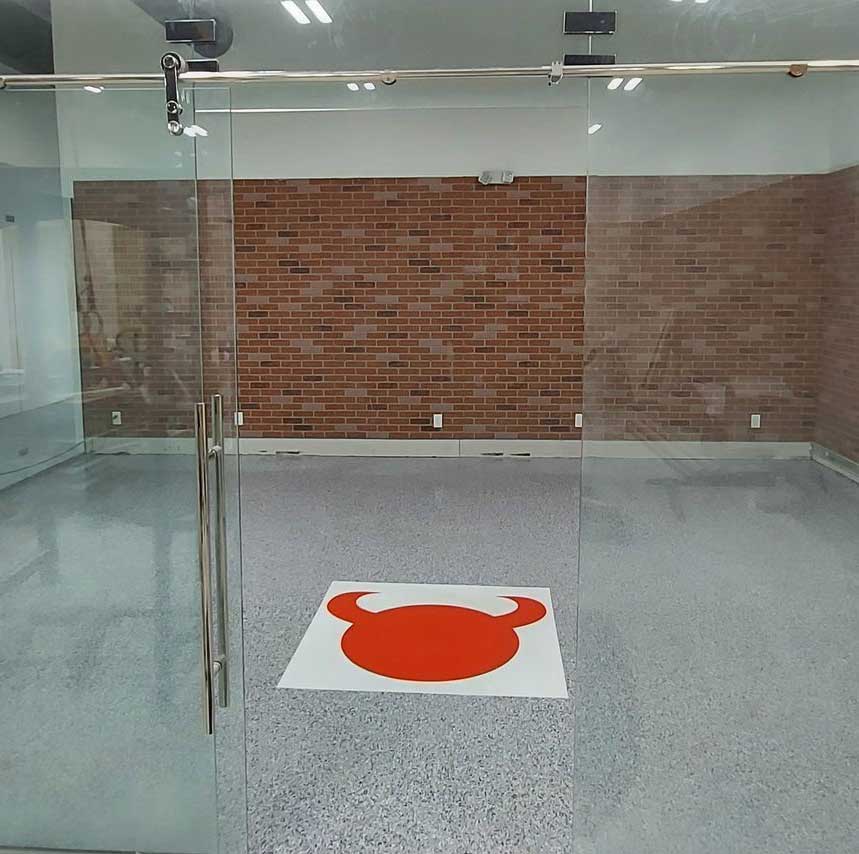
Vinyl Flake Epoxy System
A vinyl flake epoxy system is a popular flooring solution that combines the durability and strength of epoxy resin with decorative vinyl flakes. This system is commonly used in commercial, industrial, and residential settings for its aesthetic appeal, durability, and ease of maintenance.
Why choose the Vinyl Flake Epoxy System for your project?
Process Overview
A vinyl flake epoxy system typically consists of several layers applied to a prepared concrete substrate
Solid Color Epoxy System
Our concrete coatings are a high-end, durable protective layer that outperforms D.I.Y products in several ways. Its two-step process consists of an engineered resin blend and a hardener. Many prefer our professionally installed epoxy floor due to its durable, moisture-protective properties. This application process is the same as the Metallic but without the pigment step and blending step.
Why choose Solid Color Epoxy Systems?
Process Overview
Revitalize your concrete substrate with a sleek and durable solid color epoxy system using the following steps:
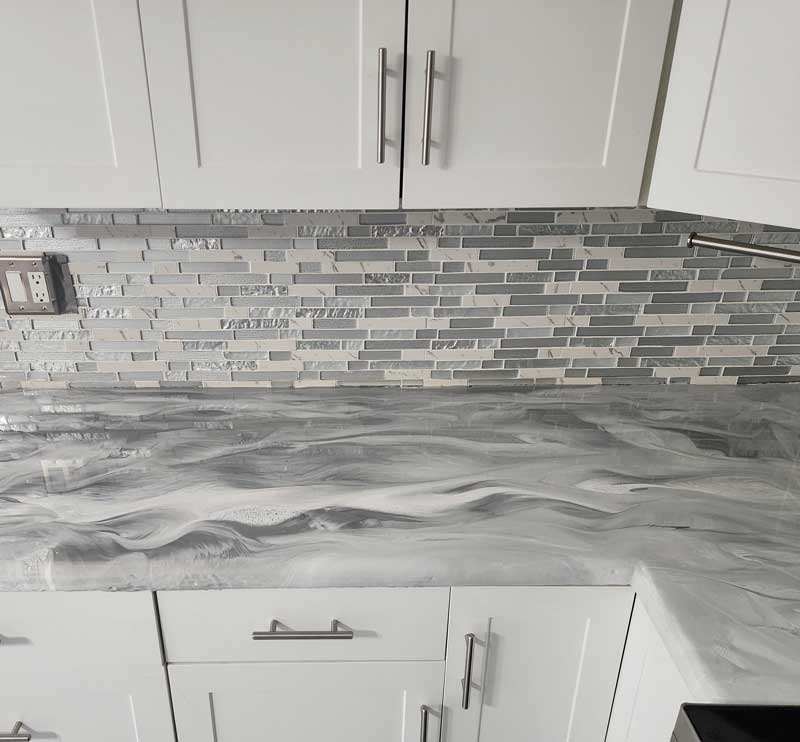
Epoxy Metallic Countertops
Epoxy countertops can be used in place of natural stones such as granite, marble, quartz, and quartzite. Those stones are good. However, epoxy can be used for those who are looking for a less costly and more convenient material. Epoxy countertops can coat most of the popular countertop materials like formica, laminate, ceramic, metal, wood, and concrete.
Why choose Epoxy Countertops?
Process Overview
Overall, professional installation ensures a high-quality finish and minimizes the risk of errors or imperfections during the epoxy countertop installation process.
We also offer Maintenance services for your epoxy and concrete surfaces
We know that accidents happen so we offer maintenance services for epoxy touch-ups or repairs. We can also refresh your floors if they get dull or scratched up.